We’ve all got photographs were the horizontals or verticals aren’t quite perpendicular.
You can try to avoid this problem by not taking photographs while drunk but it’s much more fun to use Photoshop to fix things up later. This tip also works for teetotallers who just cannae get their perpendiculars perpendicular either.
-
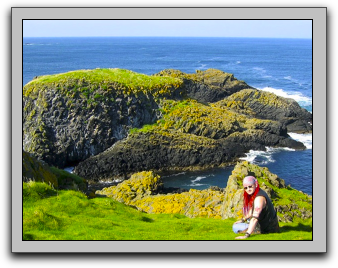
First find an afflicted image. Here’s one I’ve deliberately ‘wonkified’ to an exaggerated degree. If your horizons are consistently sloping this much, maybe try a lower strength beer.
-
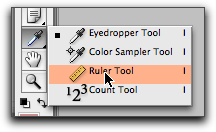
If you click and hold on Photoshop’s EYEDROPPER tool, a popup window will appear in which you will see the much ignored RULER tool, which is generally intended for measuring distances on your images. Not much use in your everyday Photoshop work, the RULER tool does have one clever party trick which makes straightening out wonky images a veritable Piece of Piss©.
-
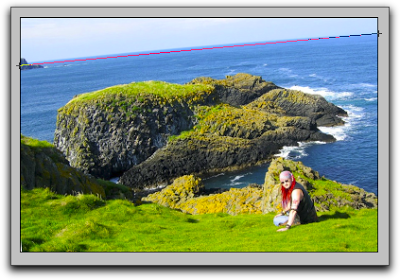
Use the RULER tool to drag out a line along a part of your image which is meant to be horizontal [or vertical - either method works]. Here I’ve dragged out along my horizon line which - obviously - should be horizontal. But if the image was of a building or tree, I could drag a line with the ruler down the side of the building or trunk of the tree. You’re just looking for something in the image which is supposed to be perfectly horizontal or vertical
-
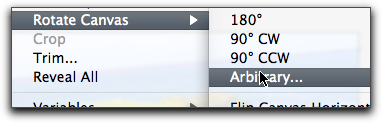
Now look under the IMAGE menu for ROTATE CANVAS and select ARBITRARY… this is the option which allows you to type by how many degrees you wish to rotate your image.
-
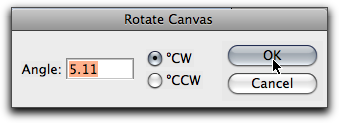
Now here’s the clever bit! When the ROTATE CANVAS > ARBITRARY dialogue box opens, it will contain a value already filled in. This value will be the angle that Photoshop measured before, when you dragged out your line with the ruler tool, across your wonky horizon. Photoshop is smart enough to know whether or not to select CLOCKWISE [CW] or COUNTER-CLOCKWISE [CCW] as the required direction in which to rotate the canvas to make that line perfectly horizontal [or vertical], so all you need to do is click OK.
-
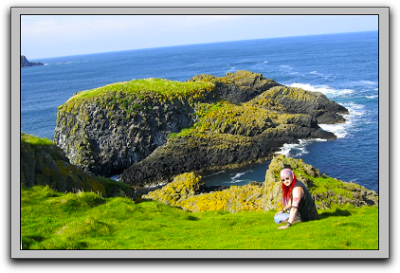
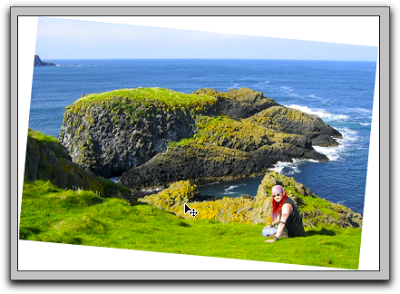
Hey Presto! - your sloping horizon is now perfectly horizontal. However, it stands to reason that by rotating the image slightly to straighten the horizon, you’ve now introduced some whitespace at the edges. This will need to be removed by cropping the image. Because I exaggerated the crookedness in this image, I’m going to have to crop quite a bit off my image. Unless you’re really cack-handed, your own images are unlikely need so much adjustment, so you’ll most likely only have to crop a tiny part, to tidy things up
-
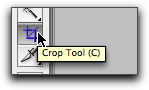
Select the CROP tool
-
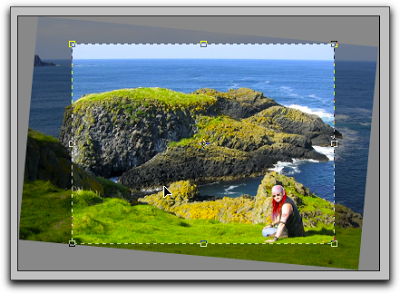
Drag over your image to select as much of it as you can, without including any of the white around the edges and then hit RETURN.
-
And there you have it. Not as large as the original image, but we now have a horizontal horizon and poor stío disnae look as if he’s clinging for grim death, onto the side of a mountain any more.