Trying to edit your Tumblr theme’s HTML was annoying enough previously but, since the latest update to the interface, it’s even more of a pain in the arse than ever. Now you have to have two tabs open and make at least three clicks back and forth between the “CUSTOMISE” section and their annoying HTML editing screen, every time you want to make the slightest change.
Here’s a way in which you can set things up, so you can edit your theme’s CSS locally and then have the changes automagically applied to your Tumblr blog:
Assumptions:
-
You’re using a custom theme.
-
You have a Dropbox account.
-
You’re using a Mac. [Actually, the OS isn’t important, but the instructions & screenshots assume a Mac, so if using sommit else, you’ll have to adapt accordingly]
-
You know what the fuck I’m talking about.
1: Login to Tumblr and, in the DASHBOARD, click on the name of your blog:

2: Then click on CUSTOMISE APPEARANCE in the sidebar.

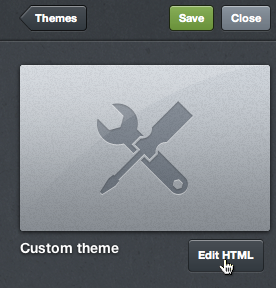
3: Now click EDIT HTML in the lefthand panel which opens:
4: When the HTML window opens, cut everything between this line…

and this one [inclusive]…

The line numbers shown here are what I see, using a customised theme based off the default. If you’ve added extra stuff into the header, or are customising another theme, you’ll likely have different line numbers, but the “style” tags should be the same.
5: Now switch your attention away from your browser and fire up your favourite Text Editor. In my case, TextMate. Create a new document and paste in all the code you cut previously.
6: Delete the first and last lines of the pasted code. ie. the beginning and end “style” tags:
Delete these two lines


7: Now save your new file to your Dropbox’s public folder, not forgetting to give it the “.css” extension:
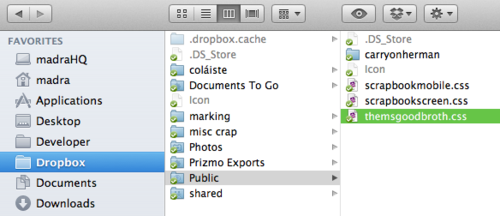
8: Now login to your Dropbox account on the dropbox.com website and navigate to your Public folder and the CSS file you just created [I’m assuming here that your local Dropbox folder on your computer has by now sync’d with Dropbox in ‘the cloud’, which usually happens pretty instantaneously]:


9: When you’ve located your CSS file in your online Dropbox Public folder, click the disclosure triangle to the right of the filename and select COPY PUBLIC LINK from the popup menu:

10: When the link popup window appears click COPY TO CLIPBOARD. Your link will obviously be different from mine:

11: OK. We’re done with Dropbox now, so head back on over to Tumblr and the EDIT HTML window again. If you correctly followed the instructions above, your theme’s HTML code should now look something like this [The highlighted line showing where all that CSS code was previously cut out]:

12: Now, instead of having the CSS code in the actual template itself, where going to import it directly from Dropbox. Into the highlighted area above, put the following, replacing my dropbox CSS URL with your own:

13: Now click on APPEARANCE, then SAVE, then CLOSE, to commit your changes:


14: Visit your blog in your browser and make sure that everything looks OK. If there’s no formatting at all, then your external stylesheet is probably not being loaded. Looks like you’ve not followed these instructions exactly and I’m afraid you’ll have to start over again.
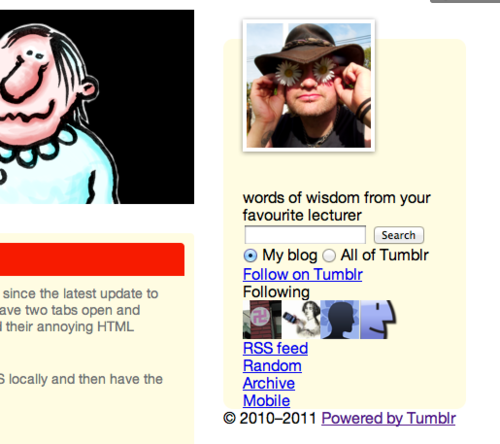
However, even if the external stylesheet is loading properly, you will probably find that there are a few visual glitches still to iron out. In my case this was most noticeable in that my page background defaulted to white and the sidebar got a bit messed up:
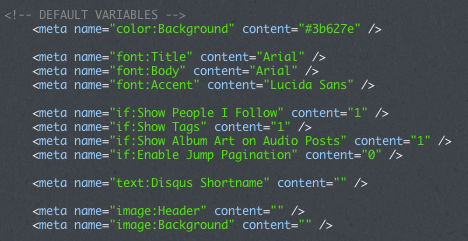
The reason for this is that a lot of themes [including the Default one that I’ve customised] use special “Tumblr Variables” within the template and CSS, to allow users to change things like background colour, fonts, etc. via the web interface. These Tumblr variable codes look like this:
They look like this in the theme HTML

And like this in the CSS

These codes are not valid CSS, so when you extract the CSS from within your Tumblr theme to an external CSS stylesheet, they’re going to break and your template will just display defaults in their place.
In order to fix things, you’re going to have to do a Find/Replace on your new external CSS file, looking for these Tumblr variables and replacing them with ‘proper’ CSS definitions
Here are the variables defined in my theme, which I’m going to have to ‘hardwire’ into the stylesheet:
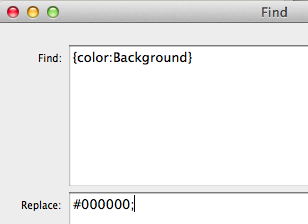
15: Open up your CSS file and do the necessary Find/Replaces. For example:
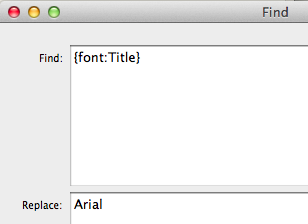
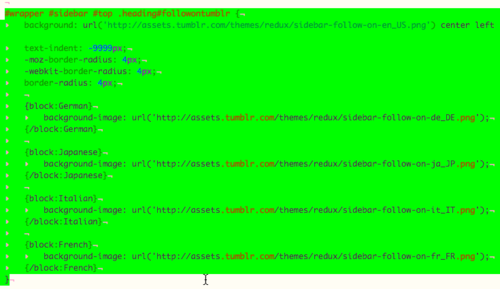
…etc. etc.
16: I also found a few other bits of conditional code in my CSS, as well. For example to display the correct “Follow” image, depending on what language you’ve set your blog to display in:

Replace that with a single declaration for the appropriate language:

17: There was also some conditional code which would either set "`display:none`" or "`display:block`" on the "Ask me Anything" or "Submit Story" sidebar items, depending on whether or not they were enabled. I just hardwired them to “display:block” as, if they’re not enabled, they won’t display anyway, so why make a conditional rule? [unless I’m missing something here?].
Before

After

After doing all of the above, I’d got rid of all the broken conditional code from the CSS and was left with a nice clean stylesheet. I did give it the once over, just to make sure and spotted a few double “;;” which needed cleaning up. Then, finally, I ran the whole thing through the W3C’s CSS validator, just to make sure nothing else had sneaked through.
Eventually, after all that cleaning up, I’ve ended up with my site displaying as it did before, but now with the CSS loaded externally from Dropbox:

So, what was the point of all that hard work? --you ask
Well, now whenever I want to edit my Tumblr blog’s theme, I can just open the local copy of my CSS file and work on that, with my favourite text editor, instead of having to wrestle with Tumblr’s fuckwitted editing interface. Because the local file is saved in my Dropbox folder, any changes I make to it are automatically sync’d to the version saved on my Dropbox in the cloud, which is then imported by Tumblr into my custom theme. So, in other words, tweaking my Tumblr theme is now as easy as; editing a local file, hitting CMD+S, waiting a second [for Dropbox to sync] and then refreshing my browser window.
Pretty damned cool, eh?
